Dependency Injection (DI) is a design pattern that makes it easier to separate different parts of an app by providing the services it needs, instead of the components creating those services on their own. In .NET Core, DI is a built-in feature, making it super easy to set up and use without much hassle. It’s a core part of the framework
What is Dependency Injection?
Normally, a class might rely on other classes to get its work done. Without DI, the class itself would have to create instances of those dependencies, which makes the code more tightly coupled and harder to change or scale. DI helps by letting us “inject” those dependencies from outside, usually when the object is created. This makes the class more flexible, easier to maintain, and way easier to test too.
Why Dependency Injection?
- Separation of Concerns: Now, the class doesn’t have to stress about how to create or manage its dependencies, letting it focus purely on its own tasks.
- Testability: With DI, it’s a breeze to inject mock objects during unit tests, making testing a lot smoother.
- Maintainability: It’s much easier to keep things organized and extend the system since dependencies are all managed in one central spot (usually configuration), instead of being scattered around the codebase.
- Flexibility: We can switch out services (like using a different logging system) without having to tweak the actual classes that depend on them.
Types of Dependency Injection:
There are three main types of Dependency Injection:
- Constructor Injection: This is when you provide the dependencies right through the class constructor when the object is created.
- Property Injection: Dependencies get assigned using public properties, letting you set them after the object has been constructed.
- Method Injection: Dependencies are passed directly into the method as parameters when you call the method.
How Dependency Injection Works in .NET Core?
In .NET Core, DI is super easy because the framework takes care of it using its built-in IoC (Inversion of Control) container. You just register your services in the container, and when a class needs something, the framework automatically figures out the dependencies and provides them when creating instances of the class. You don’t have to manually handle the whole thing.
Let’s look at a step-by-step implementation:
Step 1: Define Interfaces and Implementations
Create an interface that defines the contract of a service and its implementation.
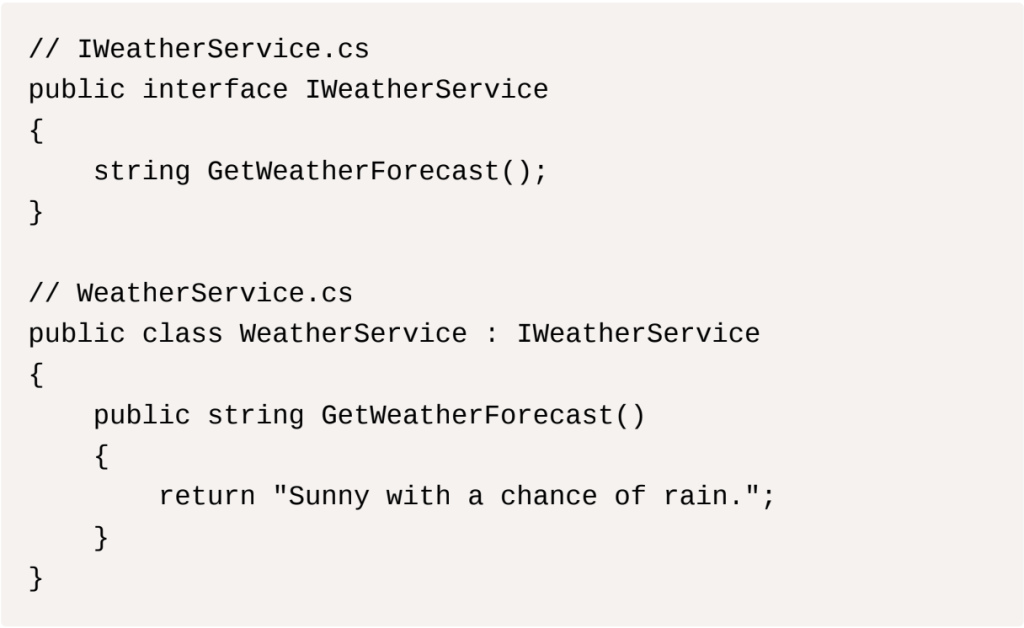
In this example, WeatherService implements the IWeatherService interface and returns a weather forecast string.
Step 2: Injecting Services into Controllers or Classes
Next, let’s use this service in a controller.

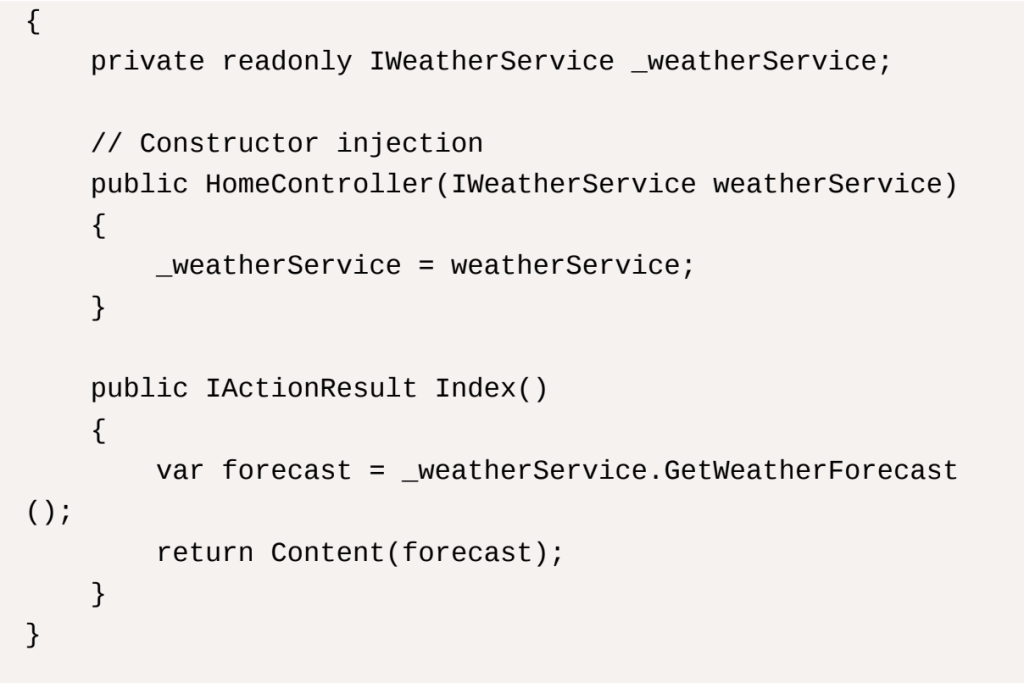
The HomeController depends on IWeatherService to get the weather forecast. By injecting the service into the constructor, we remove the responsibility of creating WeatherService from the HomeController .
Step 3: Registering Services in the Program.cs
In .NET Core 6 and later, dependency injection configuration is done in the Program.cs file. This is where we define which implementations to inject when a specific interface is requested.
Here’s how we register WeatherService as an implementation for IWeatherService :
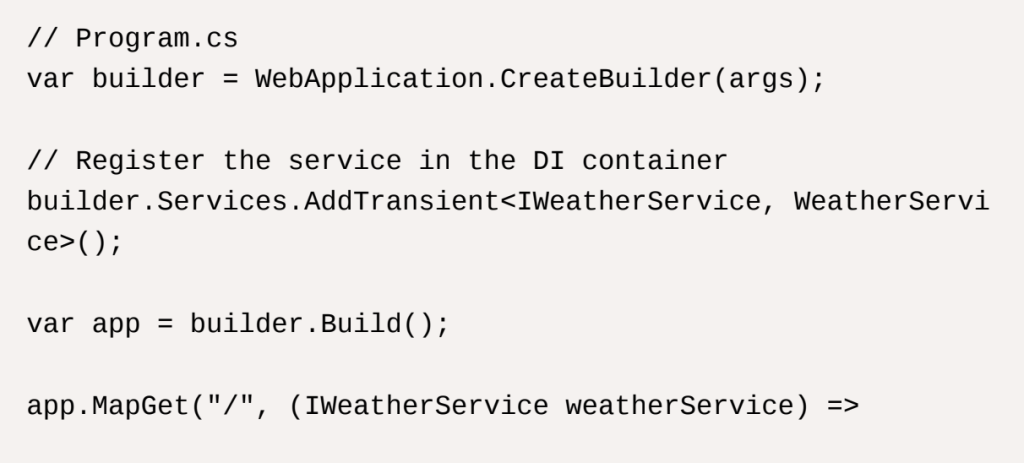
AddTransient()This registers WeatherService as the implementation of IWeatherService. The Transient lifetime means a new instance of WeatherService will be created each time it’s requested.
In .NET 6+, the Program.cs file contains both the setup and the application configuration, making it simpler than before.
Service Lifetimes Explained:
There are three different service lifetimes you can specify when registering dependencies:
- Transient: A new instance is created each time the service is requested.
Use this for lightweight services that are stateless.
Example: builder.Services.AddTransient<IService, ServiceImplementation>(); - Scoped: A new instance is created per HTTP request.
This is suitable for services that maintain state during a single request but don’t need to persist beyond that.
Example: builder.Services.AddScoped<IService, ServiceImplementation>(); - Singleton: A single instance is created and shared throughout the entire application lifetime.
Use this for stateful services or expensive objects that need to be reused.
Example: builder.Services.AddSingleton<IService, ServiceImplementation>();
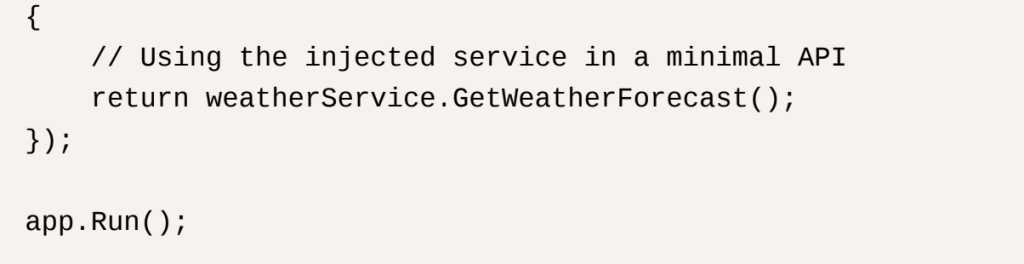
Step 4: Resolving Dependencies in Minimal APIs:
In addition to traditional MVC controllers, .NET Core allows you to inject dependencies directly into minimal APIs. This is useful in modern microservice architectures.
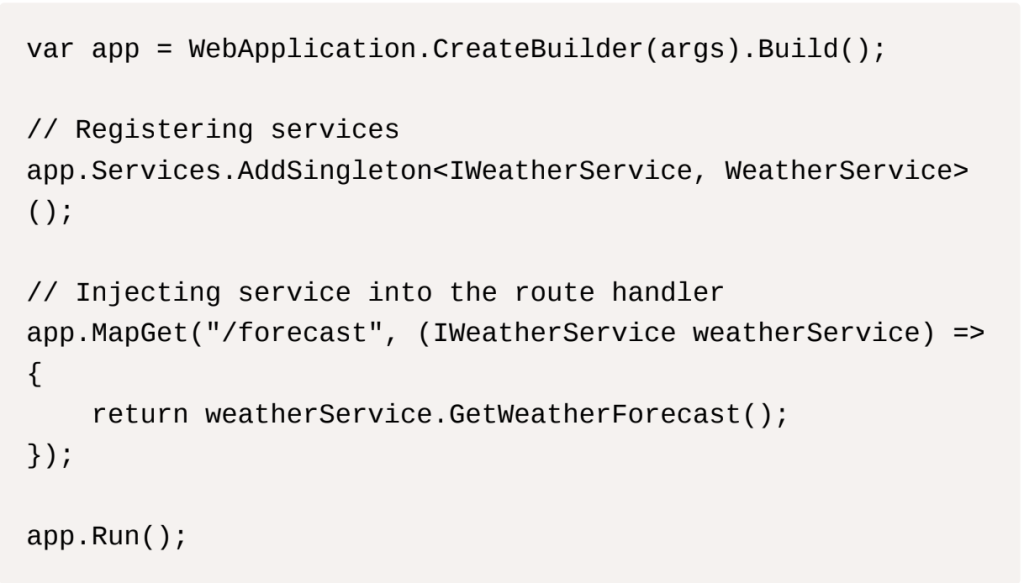
In this example, the IWeatherService is injected into the route handler, making the API lightweight and performant.
Testing with Dependency Injection:
Dependency Injection makes unit testing simpler by allowing mock dependencies to be injected. Here’s an example using the Moq library to mock the IWeatherService for testing:
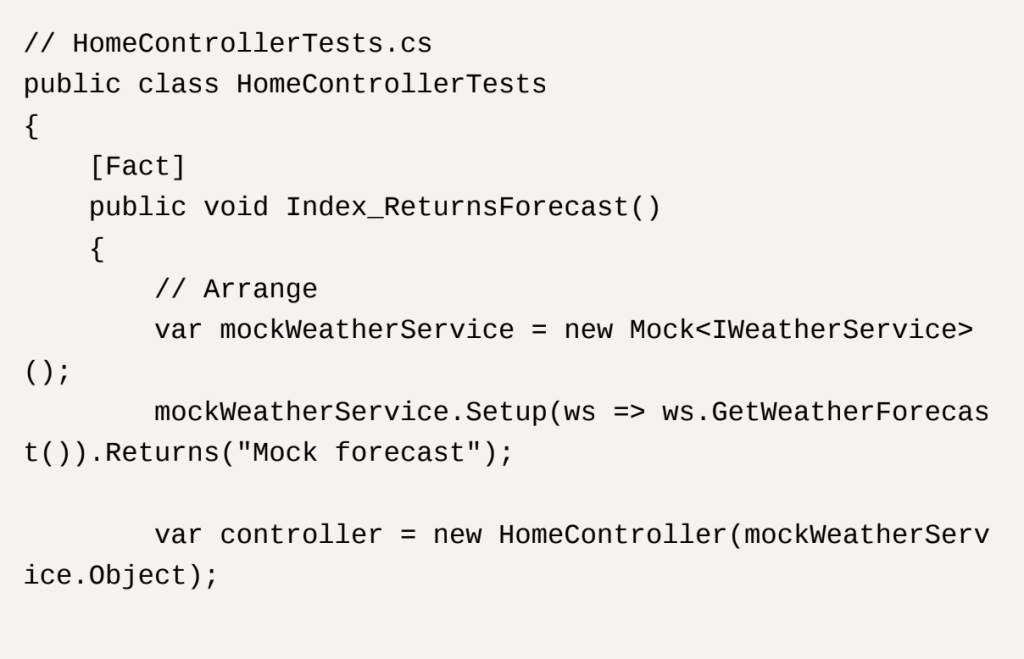
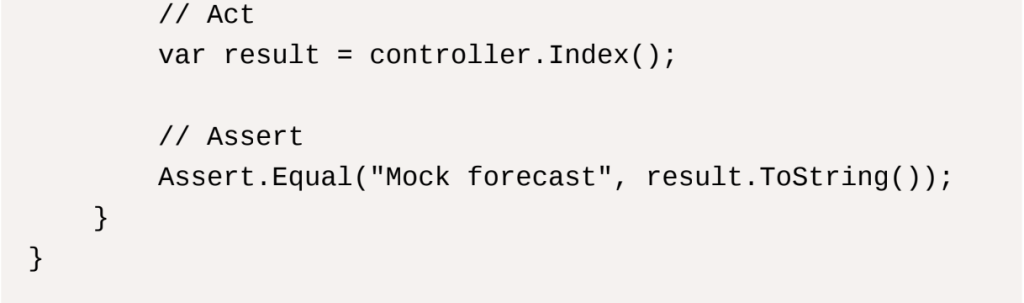
In this test, we’re mocking the IWeatherService to return a known value, making the test independent of the actual service implementation.
Bottomline:
Dependency Injection is a super handy pattern that’s easy to pull off in .NET Core, thanks to its built-in IoC container. It promotes loose coupling, making your app easier to maintain, and also simplifies unit testing since you can just inject mock services when needed.
Once you get the hang of DI, you’ll be able to build apps that are scalable, testable, and way more maintainable. Whether you’re working on a tiny project or a massive enterprise system, DI will help you manage dependencies smoothly and keep your code clean.
About Euphoric Thought Technologies:
Euphoric is an IT firm providing end-to-end product development services with its deep technical expertise and industry experience. The offerings include DevOps, Cloud Computing, Application Development, Data Science and Analytics, AI/ML, and ServiceNow consulting. You can contact us here to learn more about Euphoric. Reach out here to connect with the team.